Figure 3.1: The newGRAPH window
| Home | Download & Installation | Users Guide | Plug-in Developer Guide | newGRAPH forum |
[PENDING]
The archive newgraph.zip should be extracted in an empty directory. The java virtual machine version 1.4 or higher, should be installed on the system. The program is started by executing newgraph.bat.
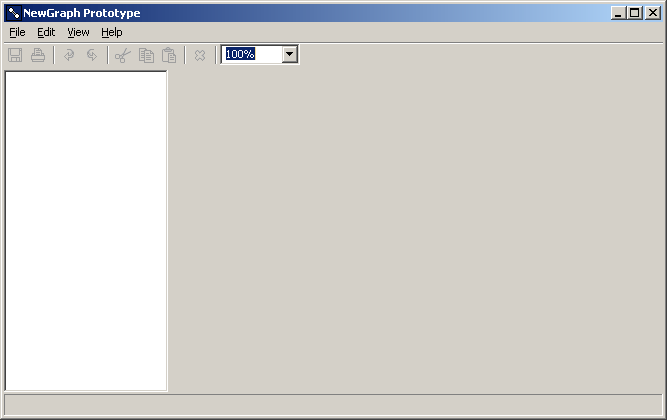
Upon starting, the the window should look like this:
Figure 3.1: The newGRAPH window
The graphs are organized into projects, which are shown on the left part of the window. Currently, there are no project, so to create a new project, choose the option from the menu File > New > Project.
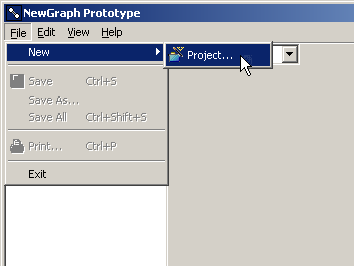
Figure 3.2: Choosing to make a new project
This displays the dialog for creating a new project. The project's name is entered. The choice not to store the project in the workspace, but somewhere else on the hard disk, is available under the project name.
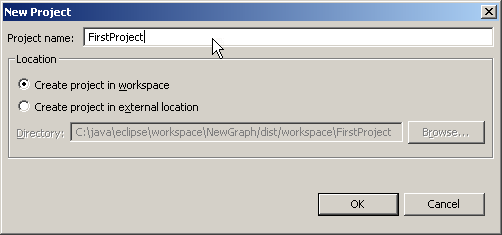
Figure 3.3: New project dialog
Upon creating a new project, it appears on the left portion of the window. Right click on the project displays the context menu, with the option Graph ML to create a new graph.
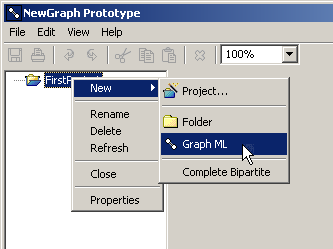
Figure 3.4: Choosing to make a new graph
When the graph name is entered, a blank canvas for creating the graph is shown. The table which shows the graph invariants is under the canvas.
Figure 3.5: A blank graph
Holding the keyboard key Shift and doing a mouse click on the empy area of the graph canvas, adds a vertex. Clicking a few times should create a graph shown on the image below.
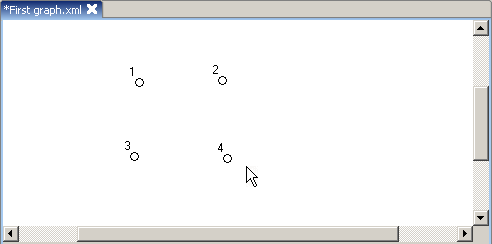
Figure 4.1: Creating vertices
The easiest way to select a single vertex is to mouse click it. The methods for selecting more vertices at the same time are explained in the table 4.3. The selection is cleared by clicking on an empty space on the canvas, or by selecting the option Edit > Clear Selection.
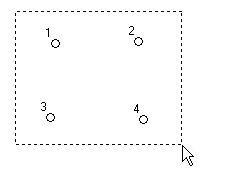
Figure 4.2: Drag selecting
To connect two vertices, you should select a vertex and Shift + click on the other vertex. The connection works with all the combinations of the mouse drag and Ctrl to speed up graph drawing.
The mouse drag on the selected vertices or edges moves the selection.
Newly created vertices are automatically numbered. These default labels could be changed by double clicking the desired vertex and entering a new label. Labels could be hidden and shown using the option View > Label Vertices.
The options Undo and Redo have the usual meaning. as well as the clipboard options Cut, Copy and Paste.
| click on empty | deselects |
| mouse drag on empty | rectangle selection |
| click vertices and edges | selects |
| ctrl + click vertices and edges | adds or removes from the selection |
| ctrl + mouse drag on empty | adds or removes the rectangle selection from the selection |
| shift + click on empty | creates a vertex |
| shift + mouse drag on empty | connects the selected vertices to the rectangle selected vertices |
| ctrl + shift + click on empty | creates a vertex and adds it to the selection |
| shift + click a vertex | creates edges between it and the selection |
| shift + mouse drag on empty | connects the selected vertices to the rectangle selected vertices |
| mouse drag on the selected vertices or edges | moves the selection |
| double click on vertex | opens the dialog for entering the vertex label |
Table 4.3: Mouse commands
There are scroll bars on the edges of the graph canvas. Clicking the scroll bars arrows when the scroll bar is already moved to the end, creates bigger canvas area. Thus, the canvas area is virtually infinite.
The graph view is zoomed using the zoom combo. The last value in the combo, "Fit window", zooms the graph so that it best fits the window.
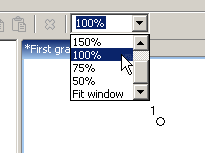
Figure 4.4: Zooming graph
The option File > Print prints the graph.
The currently selected vertices and edges are deleted by pressing the keyboard button Del, or by choosing the appropriate option from the main menu or from the toolbar.
There are commands for selecting various parts of the graph. They are situatied in the main menu Edit, or they are also accessible by right clicking the graph canvas. An overview of the built in commands is in the following table.
Note: These commands could vary based on the plugins installed. For more info, see Plugins section.
| Command | Effect | + Ctrl |
|---|---|---|
| Clear Selection | Clears the selection. | - |
| Select All | Selects all vertices and edges. | - |
| Invert Selection | Selects only the vertices which are not currently selected. | - |
| Select Induced Subgraph | Selects the induced subgraph generated by the current selection. | - |
| Select Incident | Selects the vertices and edges which are incident with the currently selected vertices and edges. | Adds the incident vertices and edges to the selection. |
| Select Neighbors | Selects the neighboring vertices of the currenly selected vertices. | Adds the neighboring vertices to the selection. |
| Select Non Neighbors | Selects the vertices which are not neighbors of the currenly selected vertices. | Adds the non-neighboring vertices to the selection. |
Table 4.5: Selection commands
The commands that perform more complex modifications of the graph are accessible from the Edit menu, or through the context menu.
| Command | Effect |
|---|---|
| Scale In Selection | Shrinks the selection. |
| Scale Out Selection | Expands the selection. |
| Complement | If no vertices are selected, creates a complement of the current graph. If some vertices are selected, does the complement of the currenly selected subgraph. |
| Contract | Contracts the selected vertices to a single vertex. |
| Make Empty | Deletes all the edges of the selected subgraph. |
| Make Complete | Makes the selected subgraph a complete graph. |
| Seidel Switching | Does the Seidel switching between the selected vertices and the remaining vertices of the graph, ie. inverts the set of edges between each selected and non-selected vertex. |
Table 4.6: Commands that modify graph
The option File > New has a number of options for generating various types of graphs. Here is a overview of the built-in types:
Note: The set of types may vary depending on the currently installed plugins. For more information, see Plugins.
| Coctail Party |
| Complete |
| Complete Bipartite |
| Cube |
| Cycle |
| Path |
| Star |
| Wheel |
Table 4.7: Types of graphs that could be automatically generated
Certain graphs can be set to be the result of an operation on some other graph, and any change of the base graph to immediately reflect the resulting graph. For instance, we may wish to observe the line graph as we edit the source graph. The menu item that lets us handle these graph dependancies is Edit > Manage Dependancies.
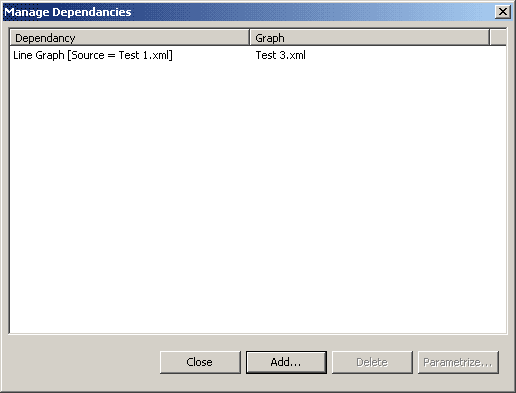
Figure 4.5: Manage dependancies
The first step in adding a dependancy is to select the type of the dependancy, and the graph that will be dependant. For instance, we may choose a Line Graph dependancy.
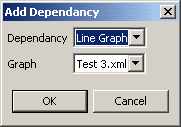
Figure 4.6: Add dependance
The second step is to enter parameters. One of the parameters is usually the source graph, so it should be open before the dependancy is created. A graph can be dependant on more other graph, weights, and other parameters.
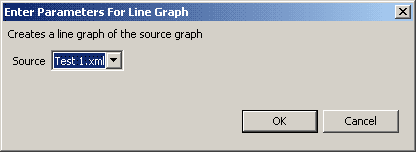
Figure 4.7: Parameters of the depencancy "Line Graph"
Changing the source graph automatically changes the resulting graph.
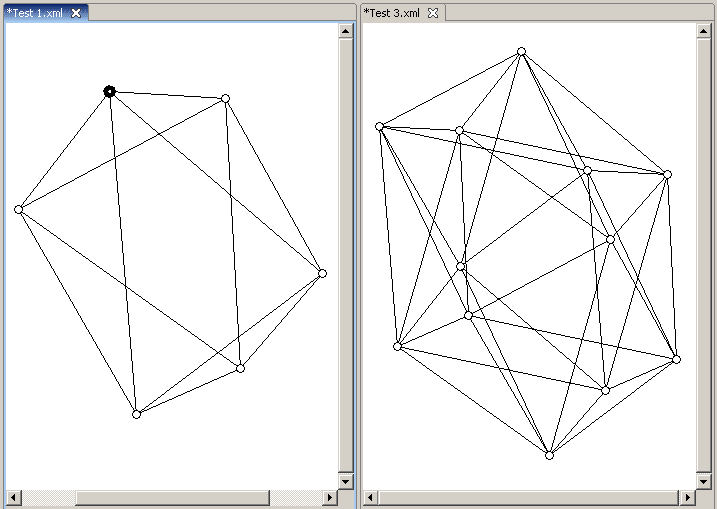
Figure 4.8: The right graph is a line graph of the left graph
The area under the graph canvas shows the graph invariants. The set of invariants which is shown is selected from the menu item View > Select Invariants.
Note: The set of invariants may vary depending on the currently installed plugins. For more information, see Plugins.
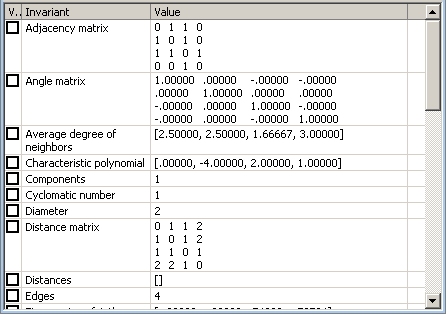
Figure 5.1: Graph invariants [PENDING: These values are not correct]
The first column in the table orders the invariant value to be displayed on the graph. In the following example, the invariant "Vertex degrees" displays the vertex degrees directly on the graph. Not all invariants could be visualized.
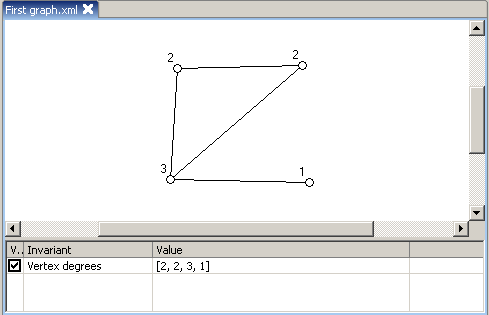
Figure 5.2: Visualized invariant
Some invariants require an additional parameter, for example the invariant "Eigenvector of K-th largest eigenvalue". The invariants are parametrized by double clicking them, or by selecting Parametrize from the right click context menu.
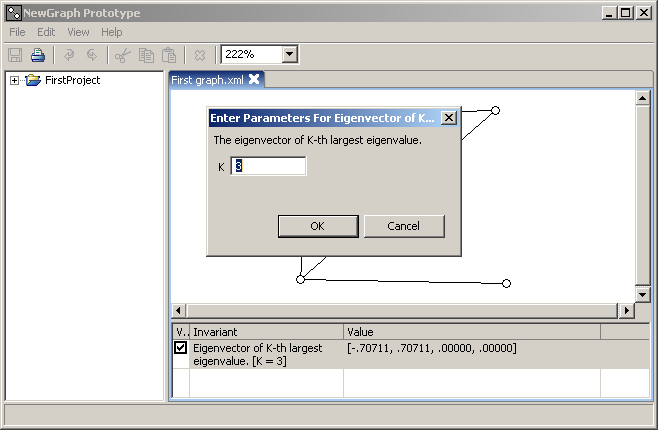
Figure 5.3: Parametrizing invariant
If more copies of the same invariant are needed to be parametrized with different parameters, the option Duplicate from the context menu makes a duplicate of the invariant. The option Remove does just the opposite, deletes a duplicated invariant.
Some invariants depend on the current selection. For instance, the invariant Distances, calculates the distance from the selected vertex to all the other vertices. The same invariant could be visualized.

Figure 5.4: The invariant "Distances" depends on the current selection
Certain plugins, such as invariants and dependancies, require weights to be assigned to vertices and edges. Before such plugins could be used, weights have to be created. Weights are managed in the menu item Edit > Choose Weights.
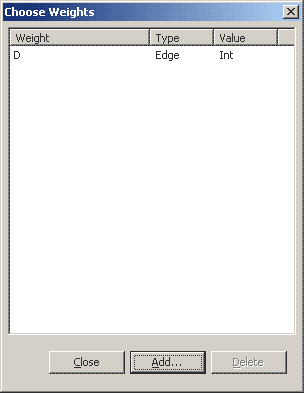
Figure 5.4: Choose weights dialog
Weights could be assigned to vertices and edges. They can have two types of values: integer and real. As an example, we can create a weight named "D", on edges, with integer values.
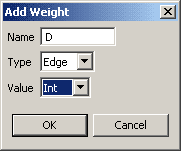
Figure 5.5: Add weight dialog
We can now select the invariant Shortest Distances, which calculates the shortest distances between edges using the weights on edges. Right clicking an edge, and choosing the option Weight Edge, we are shown a dialog for entering weights of the edge.
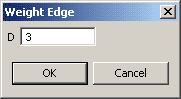
Figure 5.6: Weight edge dialog
After entering all the weights, the invariant returns the shortest distances.
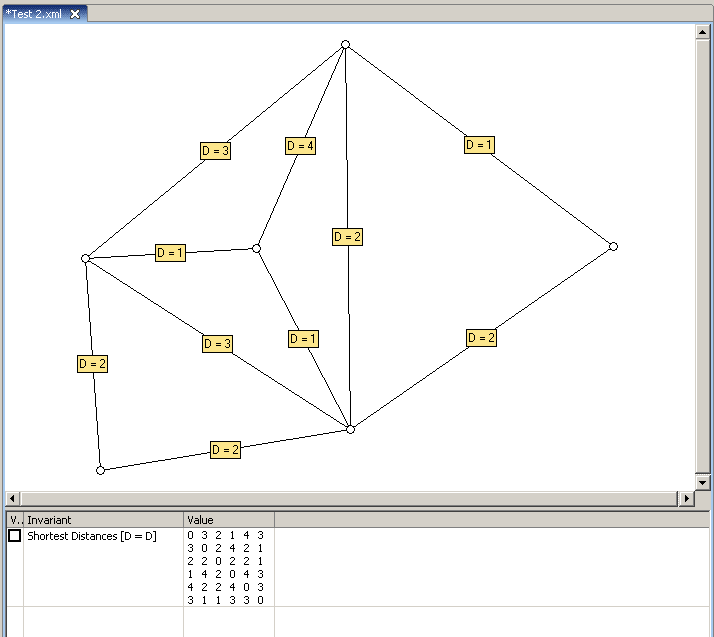
Figure 5.7: Shortest distances
If many weights and invariant values are choosen to be displayed, only a few are displayed next to the vertex or edge. The rest are displayed if the user keeps the mouse over the vertex or the edge for a brief moment.
A right click on the graph explorer brings a context menu for manipulating files. Most of them should be fairly understandable, and are presented in the table 6.2. Multiple graphs and directories could be selected by using the Ctrl and Shift keys.
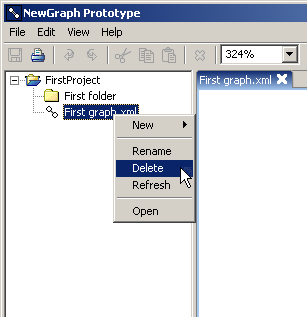
Figure 6.1: The graph explorer context menu
The project workspace is the subdirectory of the directory where the program is installed. By default, graphs are stored in the GraphML format. Graphs could be organized into directories and subdirectories.
| New > ... | Creates a new project, folder or graph. |
| Open | Opens the selected graph or project. |
| Close | Opens the selected project. |
| Rename | Renames the selected graph or directory. |
| Delete | Deletes the selected graphs, directory or project. |
| Refresh | Refreshes the workspace for changes. |
| Properties | Shows the project properties. |
Table 6.2: File commands
The graph editing area could be split for viewing two graphs at the same time. To achieve such splitting, the small sash on top of the graph should be mouse-dragged to the border of the graph editor. When the cursor changes to arrow, release the mouse button, and the graph editor will get split. To combine a split graph editor, the sash should be dragged on top of another sash. The same procedure can move a graph between split areas.
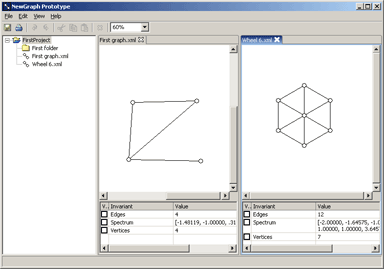
Figure 6.3: The graph editing area horizontally split
The working area could be split more times.
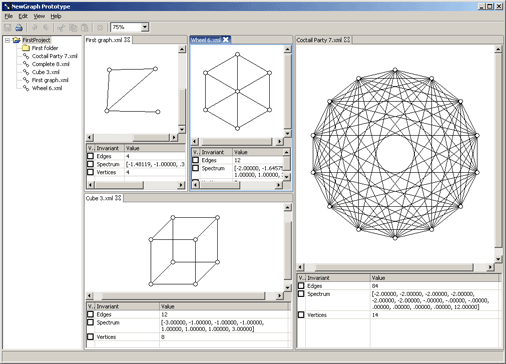
Figure 6.4: Multiple graph canvases
newGRAPH could be added with new invariants, graph transformations, graph generators and support for more file types. The plugins which are distributed as a ZIP or Jar archive, should be saved under the plugins/lib subdirectory of the newGRAPH. The plugins which are distributed as classes should be saved under plugins/classes subdirectory.
Dragan Stevanović - [PENDING]
Vladimir Brankov - [PENDING]
Dragoš Cvetković - [PENDING]
Slobodan Simić - [PENDING]
The program was programmed on Java programming language, using the Eclipse development platform. The user interface is done using the SWT - Standard Widget Toolkit library for Java. The program uses the CERN's COLT Java library for linear algebra.
Java - http://java.sun.com
Java Virtual Machine -
http://www.java.com/en/download/manual.jsp
Eclipse - http://java.eclipse.org
SWT - Standard Widget Toolkit -
http://www.eclipse.org/platform/index.html
GraphML -
http://graphml.graphdrawing.org/
COLT -
http://cern.ch/hoschek/colt